Digital Photography and Imaging - Project 2
Project 2
21/04/22 - 26/05/22 (Week 4 - 9)
Digital Photography and Imaging (GCD61204)
Class 01 Sec 03
Jeslyn Lim Suharja (0346928)
1.0 Project 2A: The Double Exposure
1.1 Exercise 1:

Fig 1.1.1 Step 1 (Masking)

In this phase, I added the trees, positioned them, and removed the unwanted characteristics with the brush tool (hair, etc.). Then I applied the solid color layer and matched the color to the grey background from the tree image.

Fig 1.1.3 Final Outcome
Lastly, I added additional elements given from the drive like the clouds and birds.
1.2 Exercise 2:

Fig 1.2.1 My Own Version Following The Tutorial
In this, I decided to add more clouds near the head and added more birds on the bottom.
1.3 Exercise 3:

Fig 1.3.1 Picture Used

Fig 1.3.2 First Attempt
To me this double exposure looks weird and I am not satisfied with it, at the last minute I decided to redo it.

Fig 1.3.3 Image Used For The Final Outcome

Fig 1.3.4 Final Outcome
2.1 Project 2B: Hearst Mansion
2.1.1 Exercise 1:

Fig 2.1.1.1 First Step
This is the 1st step and that is to use the quick selection tool and mask Shazam.
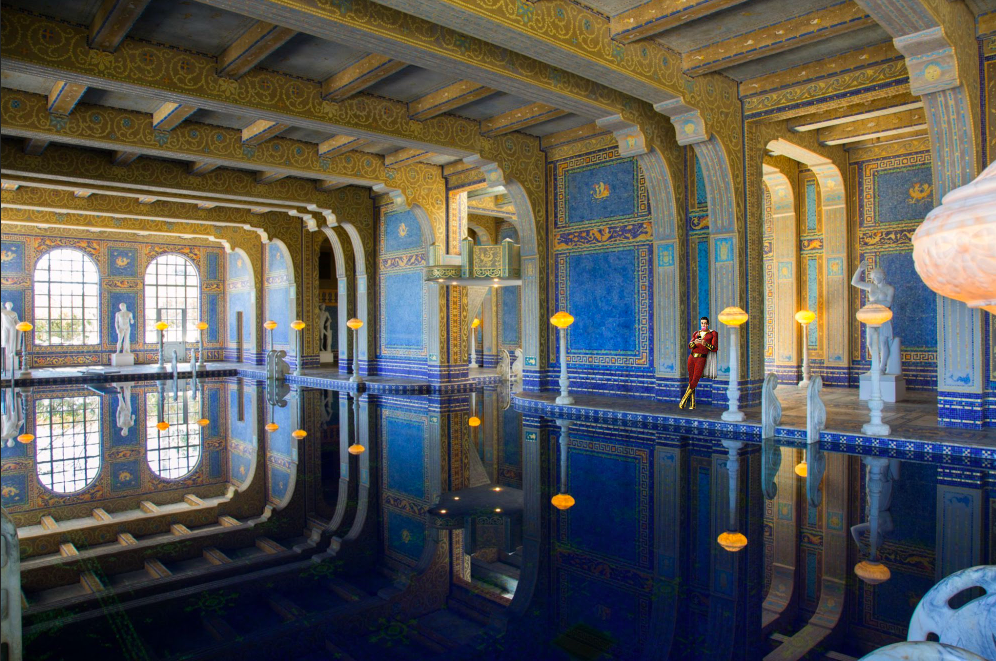
Fig 2.1.1.2 Second Step
Next, we are to move the Shazam and adjust the size accordingly. After everything is in place, we adjust the colors, contrast, and saturation for Shazam to blend into the background.

Continuing, to make the reflection we are to duplicate the top image and flip it vertically. Then we darken the image and erase the excess leg.

Fig 2.1.1.4 Fourth Step (Final Outcome)
Lastly, we add shadows using the brush tool on a new layer. The shading is blurred and reduced in opacity to make it seem more realistic.
2.1.2 Exercise 2:

Fig 2.1.2.1 Image I used

Fig 2.1.2.2 Final Outcome
Following the steps in Exercise one this would be the final outcome I made.
2.2 Project 2B: Recoloring Black and White
2.2.1 Exercise 1:

Fig 2.2.1.1 First Attempt
This is my first attempt after following the steps in the video. The color palette I picked was inspired by Ariel from The Little Mermaid. Her signature red hair, purple gown, and a green mermaid tail color for the background. However, I believe the red hair is a little too strong, and the green background clashes.

Fig 2.2.1.2 Final Outcome
I decided that making color harmony by using different shades of blue would be a fun idea. So, I decided to try it out, and as it turns out I preferred this version.
2.2.2 Exercise 2:

Fig 2.2.2.1 B&W Picture Used
I purposely chose this image as the hair is easy to edit.

Fig 2.2.2.2 Step 1 (Skin Color)
First, a solid color layer was created. Then I looked up color codes for Caucasian skin tones on Google; the one I picked is #F3D2C3. The layer type was then modified to "color." I inverse the color by selecting it on the layer mask (Ctrl + I). Afterwards I took the brush tool, set color to white, and began to fill in the skin. I erased the lips and eyes with the same brush but in black.

Fig 2.2.2.3 Step 2 (Lip Coloring)

Fig 2.2.2.4 Step 3 (Hair Coloring)

Fig 2.2.2.5 Step 4 (Eye Coloring)

Fig 2.2.2.6 Step 5 (Jewelry Coloring)

Fig 2.2.2.7 Step 7 (Background Coloring)
3.0 Project 2C: Photomanipulation
3.1 Mood Board/Visual Research

Fig 3.1.1

Fig 3.1.2

Fig 3.1.3
3.2 Idea Summary
I really wanted to create an art piece that looks odd, that is unique and perhaps funny in a way. During the sketching process, I tried utilizing the use of puns and created the "unicorn". Next, I made something that would look like it belongs to the film Alice in Wonderland. Lastly, I sketched out an earphone with added beaks making them look like ducks. Unfortunately, these ideas didn't make it into the final cut as I had a better idea that still follows the "weird" concept.
3.3 Sketches

Fig 3.3.1 The "Unicorn"

Fig 3.3.2 Giramp

Fig 3.3.3 Earducks
3.4 Mock - up

Fig 3.4.1 Mock - Up 1

Fig 3.4.2 Mock - Up 2
3.5 Behind the Scenes

Fig 3.5.1 Behind the Scenes in the studio
3.6 Step-by-step Process
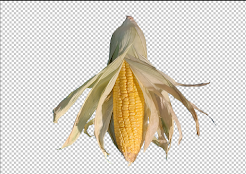
Fig 3.6.1 Step 1 (cropping out the corn)
I first mask out the background of the corn and flipped the image vertically.
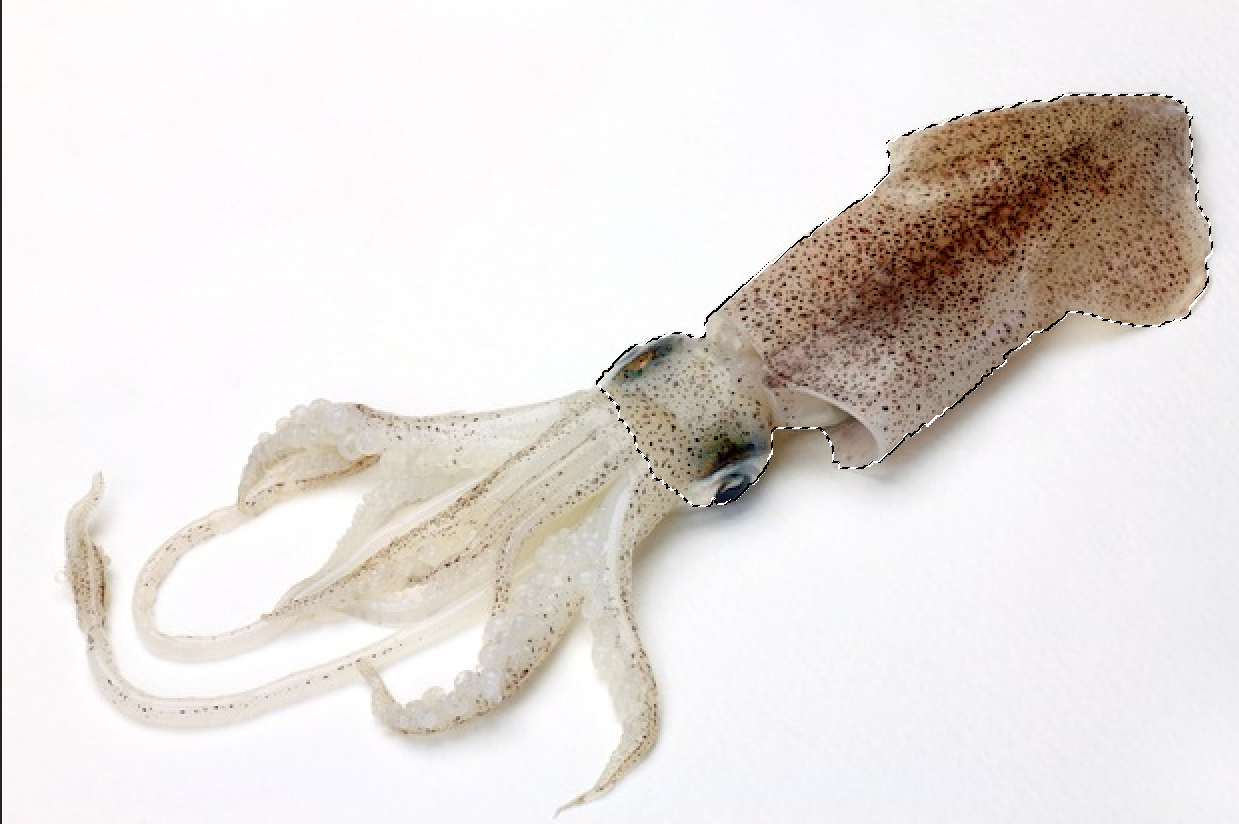
Fig 3.6.2 Step 2 (cropping the squid head off)
Then I took an image of a squid from the internet. Pasted it on a different page, used the select tool and selected around the squid's head and copied it then pasted it into the same page as the corn.
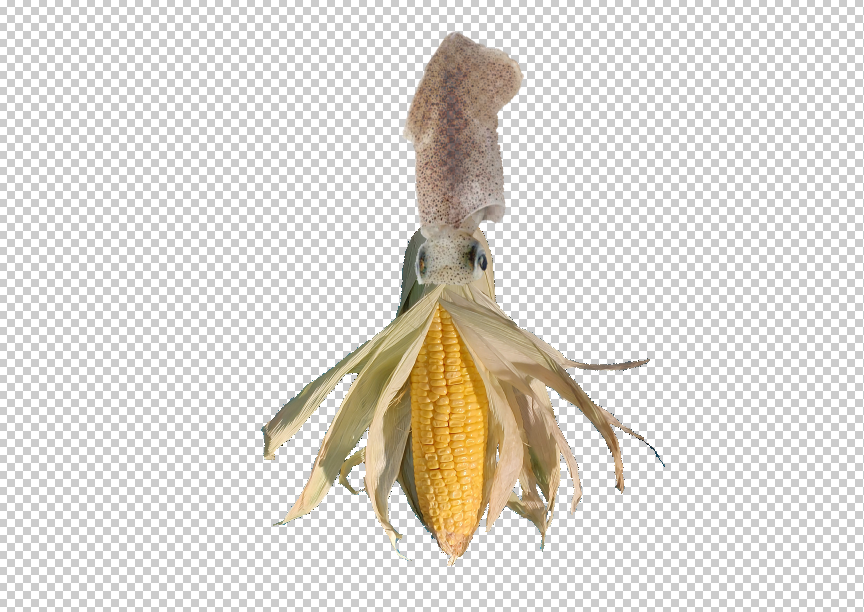
Fig 3.6.3 Step 3 (Adjustments)
Next, I adjusted both size and position accordingly to make sure that it'll fit together.

Fig 3.6.4 Step 4 (Erasing the Excess Corn)
In this step, I added layer mask and used the eraser tool to clean out the excess corn edges.
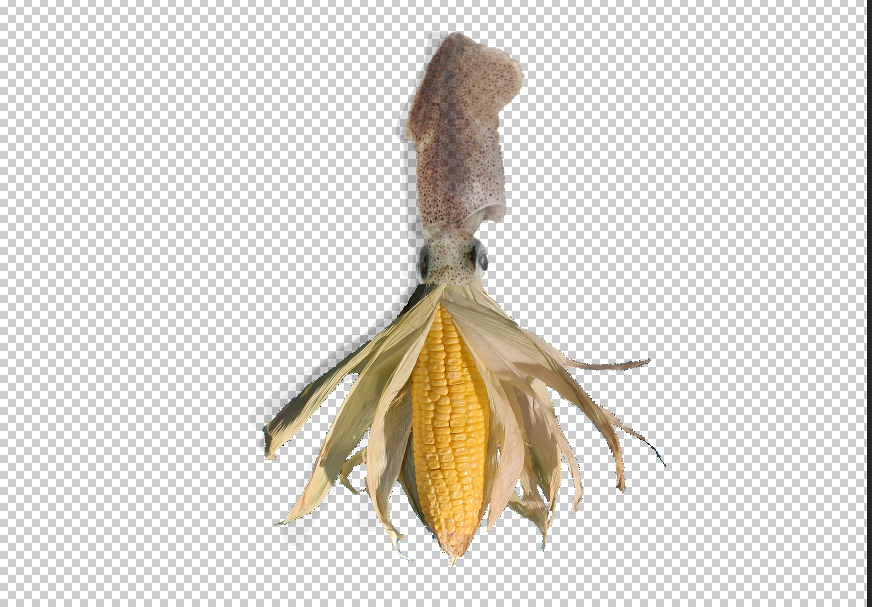
Fig 3.6.5 Step 5 (Shading)
On a new mask layer I used the brush tool and added some shading.

Fig 3.6.6 Step 6 (Final Art & Background)
Last, I added a blueish-green background color.
When looking for pictures of squids on google, I tried finding one with similar lighting (light from the right) then made sure the color of the squid is as about as pale as the corn leave. As mentioned, the corn and the leaves looks very similar as to the tentacles squids have.


Comments
Post a Comment